EPIC System - IPB Solution Trainings
These EPIC System™ trainings will help you navigate your Audio Enhancement intercom, paging, and bells system. Whether you are brand new to EPIC, or experienced and needing a refresher. This page will help get you trained up and comfortable with your schools EPIC System.
Click on the training image or desired chapter below to access the trainings you wish to complete.
Other Resources
EPIC Tech. Admin Training
Chapter 1 - Introduction to EPIC
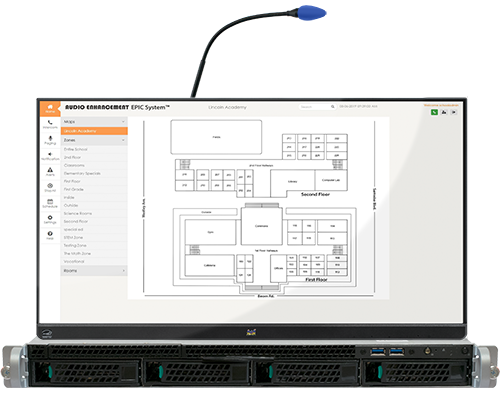
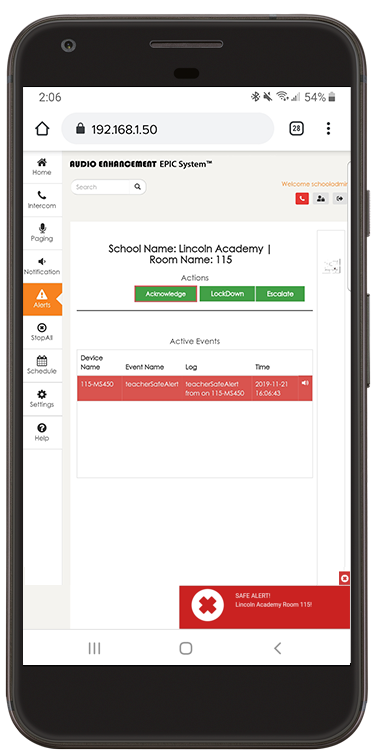

EPIC (Education Paging & Intercom Communications) System™ was built from the ground up specifically for K-12 education and provides industry-leading access to all of the functions needed every day to efficiently operate a modern K-12 campus. EPIC System features flexibility in bell scheduling and zone creation.
Anyone with appropriate credentials can manipulate bells and zones. 2-way intercom with every classroom and emergency notifications are also included with EPIC System. It has never been easier to communicate with the entire campus or directly communicate to a specific location, as the situation arises.
School bells are a critical function for a campus, so EPIC System provides a flexible and easy-to-use bell scheduling tool. The interactive campus map provides situational awareness for all communications and urgent situations.
Chapter 2 - Preparing to Use EPIC

Using your system to manage student movement has never been easier. You can create bells and notifications that ring into a single room, a few specific rooms, or your whole school. It takes a little pre-planning in order to make the configuration as useful as possible. It is helpful to have the necessary materials with you when setting it up.
If you want to complete this in one sitting, start at the top of the list and work your way down. When you are finished, you will have a completely customized system, ready to use. If you need to get up and running quickly it's not a problem, the system includes standard bell tones and prerecorded messages.
What makes the EPIC System so different is the ability to easily change it after it has been configured.
Please gather the following before continuing:
School year calendar
Bell schedules for the various day types
(standard, assembly, testing, early-out, lunches, etc...)
Scripts for any prerecorded messages
(the pledge, fight song, lockdown, bad weather, dismissal, etc...)
Music or songs to use as bells or play between classes
Accessing Your EPIC System
You can have multiple users in your EPIC System. You have the ability to create and customize more user accounts as needed. This will be covered later in the course, or Audio Enhancement can help configure this.
Contact us at support@audioenhancement.com or 800.932.3578
Users can access EPIC from any computer on the network using Google Chrome. To access your system, use the IP address or web address that was assigned by the district IT department. Console log in information is located in the user manual.
A school administrator account has been created for your use when configuring the system. Do not use the console default login from other locations. Intercom and paging functions are only supported from the console. Other user accounts are for configuration and SAFE System functions only.
Chapter 3 - EPIC Intercom Calls

An intercom call is a two-way communication call. It’s live audio in both directions, just as you to someone on the phone. Anyone with appropriate credentials can answer and initiate EPIC intercom calls with one to two clicks.
Initiating Intercom Calls
Making an intercom call to a classroom requires you to select the room from your interactive map, then the intercom button. End the call when you are ready with the red end button that will appear when in an active call.
Receiving Intercom Calls
Receiving an intercom call is simple with a single click of the accept button. The red end button will appear after you are in a call, and can be pushed when you wish to end the call.
Chapter 4 - EPIC Paging
Paging is one-way communication to multiple locations or the entire school. You will not be able to hear a response back from the classrooms when performing a page.
Chapter 5 - Notifications
A notification is a prerecorded message or tone that can be played upon demand. It will play across the entire system in classrooms, hallways, and exterior areas.
Chapter 6 - SAFE Alerts
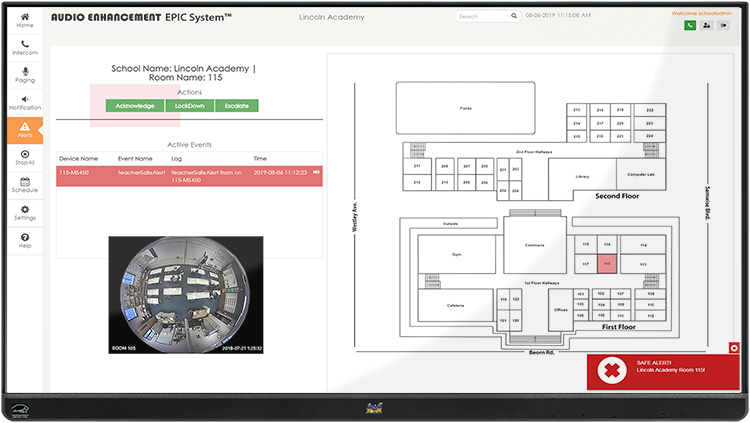
* Your school or district will create and provide you with your campus SAFE Alert plan.
SAFE System provides a systematic solution to communicate incidents quickly for immediate resolution. For the safety of faculty, teachers and students, quick alerts connect classrooms to the right people at the right time. Alert activation is easily accessible from the teacher microphone and from an alert notification button. A teacher can send alerts from anywhere on campus.

When a SAFE Alert is over an admin user must end the alert. Standard configuration does not allow front office standard users to end an alert. The administrator must go to their computer and log into the EPIC System and click end alert. A text box will appear and notes must be added in order to end the alert. If you choose to Audio Enhancement can help you to add this ability to the front office console user.
Chapter 7 - Changing the Calendar
The calendar is used to set the bell schedule for a specific day. Any zones used by the bell system must be created by a school administrator.
Chapter 8 - Setting up your Bells
The EPIC System bell schedule was designed to simplify scheduling for school administrators. You can configure your bells to fit the specific needs of your school. From cleanup bells to assembly schedules, you can manage bells for the whole school and individual zones or rooms.
Day Types
Day type refers to the different types of bell schedules that you will use throughout the school year. You can set up as many day types as needed.
Start with what you know you need. You can always go back and add more day types later. Watch the video below and create your day types.
Yearly Calendar
Creating and changing the calendar is easy. Before you get started, get a copy of the school year calendar.
You will be adding this information to your EPIC System calendar. If you can’t get all the information, you can always make changes later. This video will walk you through creating your calendar.
Zones
Zone creation is what provides the most flexibility when using EPIC System. Zones are used for paging and bells. They allow you to broadcast to specific locations on campus. Zones can be added and adjusted at any time.
You will likely have more zones than you anticipate. A good place to start is with lunch shifts, grade levels, and electives. Using your school map and bell schedule will greatly assist you in creating the zones you need.
Bell Schedule
Have your standard bell schedule on hand when you are ready to add your bells. This should just be the beginning of creating your schedule in EPIC. Consider anytime a teacher or students will need a reminder that it is time to move. Art, STEAM labs, industrial arts, computer labs, and science classes often need a reminder to start cleaning up and/or saving their work. With EPIC you can ring a bell in a single classroom. Your options are only restricted by your creativity.
Customizing Audio
Adding some custom music to your bell schedule can go a long way in creating a positive school culture. When using the recording feature in the EPIC System you can record your own script for all emergency notifications, your morning greeting, or even the pledge. Having your voice in a calm tone can be very reassuring to your students and faculty during an emergency. We highly recommend that you record your own notifications for your campus.
Using some ringtone websites can give you small audio clips that are perfect for bells. Be sure to always preview an entire audio clip when downloading from these sources. Some clips may not be school appropriate!
ZEDGE is one site that many schools have used to get audio clips.
Chapter 9 - EPIC Settings

As an administrator of the system you can access settings using the gear icon on the left side panel. The settings allows a principal access to all areas of the system.
There are sections of the settings that are designed for IT use only. Please refer to the department that responsible for managing your intercom systems if you have questions. Audio Enhancements support can also help you make changes as needed.
Below you will find a list of all the settings tabs and their functions.
Settings below with warning signs are items that Audio Enhancement recommends you do not change with out consulting support for assistance. (800)-932-3578
Devices
Look at all devices on your campus and see at a glance that all equipment is online and functioning. Provide IT with IP address and the ability to add, edit, and replace the devices in the system.
Consult support before changing, adding, or replacing devices in EPIC.
Map Set Up
Edit your school’s EPIC map, including creating or changing zones, adding new or portable classrooms, or making any other room changes.
Schedule
Add or modify bell schedules for your school year. Make instant changes to today’s (or any day’s) schedule.
Audio
List of all audio that can be used in the system for bells and notifications. Play, preview, upload audio as well as record custom messages.
Events
Customize advanced system events, such as SAFE alerts and notifications
Consult support before changing or adding events to EPIC.
Classroom Volumes
View and change volume levels of amplifiers in each room.
System Settings
School information, date format, UI, *LDAP, network, asterisk advanced, roles, *upgrades, *backup, and logs
*Consult support before changing or adding events to EPIC.*
Devices
On the device tab you can see all the devices that have been added to the system. Adding new devices is handled by your integrator or the district department responsible for your intercom system. The status of each device is clearly identified by a green or red dot in the status column. Green means the device is online and should be functioning as expected. If the light is red, the device is offline and can not be communicated with. The IP address for each device is also listed and would be helpful when asking support to troubleshoot an offline device.
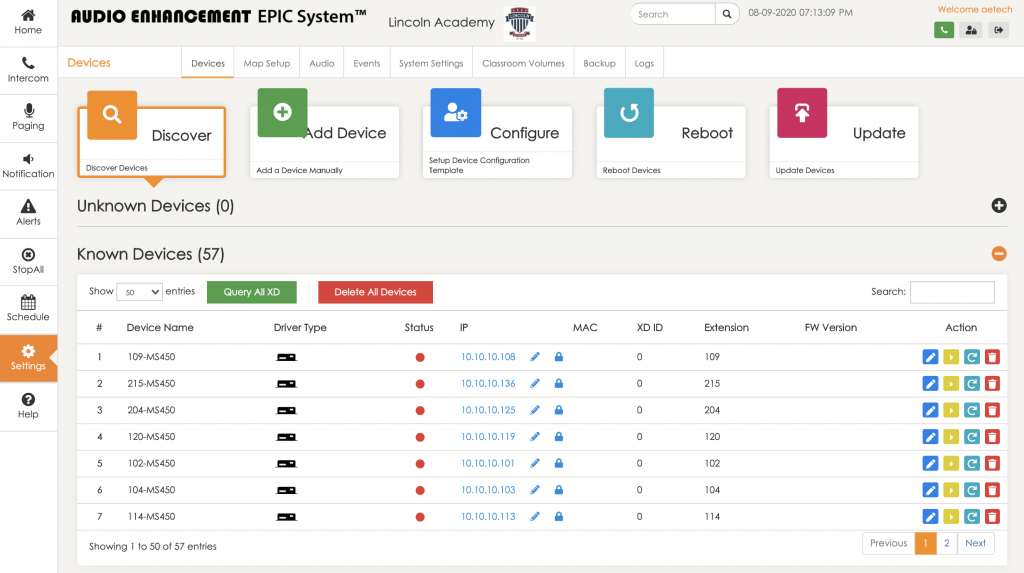
To access the actual device you will need the user name and password. All usernames and passwords have been provided to the district or school as part of the close out information. All MSxxx devices can be tested on this page. Under the actions column you can see a play button. Clicking this button will play a tone on that device, and will be heard in that zone or classroom.
Map Set Up
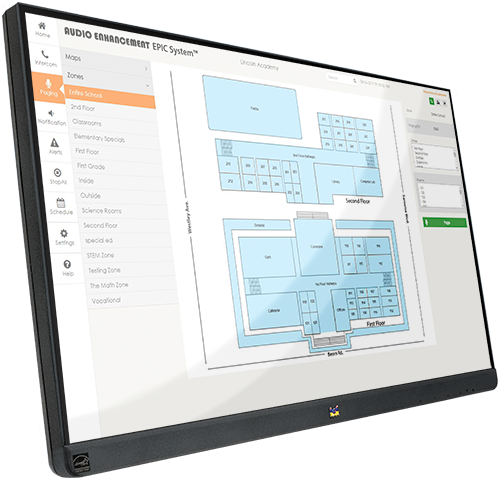
As the administrator of your EPIC System, the map set up tab will be very important to you. Creating zones and assigning teachers to their rooms will be how you use it most frequently. If you are using room control for volume, projectors, interactive displays or VIEWpath, your teachers will be in the system and need to be assigned to their classroom.
Zones are the key to being able to manage your intercom, paging, and bell system. We have already covered how to create zones, but continue to think about other ways you would like to have specific messages sent to specific classrooms.
One of the features has never been available in IPB systems, specific evacuation directions. You can record specific directions for each group of rooms or single classrooms to tell them where to evacuate to based on their classroom location. These zones will be created the same way your bell zones are created. We will use them in the notifications and be configured in the events tab. Below is a video that will cover the rest of the functions of the map setup tab.
Event Editor
The event engine in EPIC provides us great control and automation of the EPIC System including integration into other outside systems. Within the event engine in EPIC, we can take input from many sources, analyze that data and then perform actions based on the data. There are three types of events that you would want to know how to edit (Email alerts, text message alerts, and notifications). For the remaining event items we recommend you contact Audio Enhancement to assist in configuration.
We recommend that the district sets up an email group to be used with SAFE Alerts. This way once it is configured changes can be made to the group and have no need to make changes in the EPIC server. The video above will show you how to make changes the alert tools and notifications.
This next video with walk you through how to edit the SAFE Alert text messaging and E-mail notification recipients. Allowing you to add, edit, or remove recipients from the list.
The policy of procedures to be followed once a SAFE alert is received is created and distributed by the school or district that implemented the EPIC system.
Classroom Volume
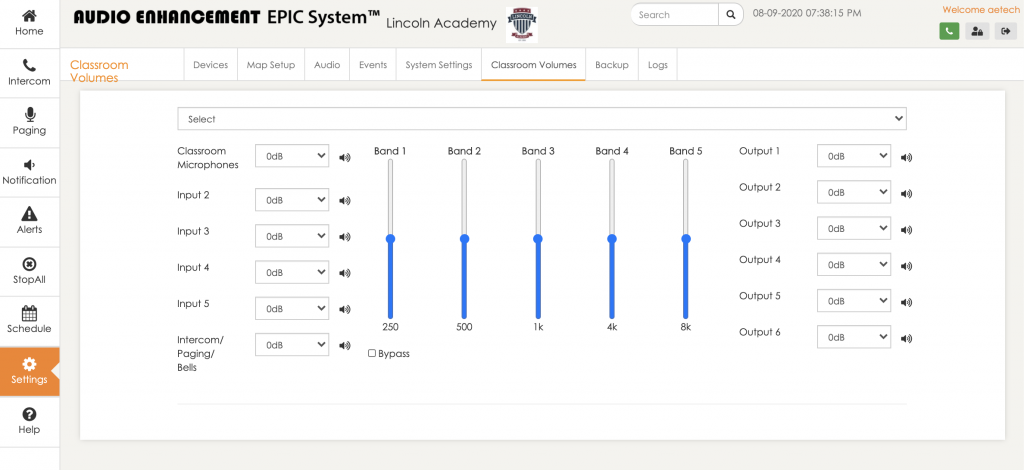
The classroom volume tab allows for the adjustment of classroom volumes through the web interface. Each classroom volume has been set to the recommended factory default and should not be changed unless fixing a specific issue. First select the classroom from the drop down menu. Then you will be able to adjust the specific volume setting for each input or output. In the figure to the right you can see the volume setting range. 0 dB has the most volume, while -72 dB has the least.
Classroom Microphones: This is already set to maximum volume and is adjusted by the teachers microphone.
Inputs 2-5: These are set to maximum volume. Your computer will be connected to one of these and is adjusted by the volume control on your computer.
Intercom/Paging/Bells: This is the volume for the all items coming from the EPIC System. It's set to negative ten which will allow you to add some volume to those as needed to individual rooms.
Output 1 and 2: These are the speaker outputs and are set to maximum. Volume adjustments should be handled with the microphone and the computer.
Output 3,4 and 6: These should not be adjusted.
Output 5: This is the line output. It will be used for providing audio to external devices (cameras, audio recorders…). It is set to maximum and should be adjusted by the device it is connected to.

System Settings
This next video will cover the system settings tab. The system setting tab contains most of the settings for configuring the appearance and users for the system.
There are several tabs used for back end configuration and we recommend you do not make any changes beyond what is covered in this video.


